Manor House at Elm Bank
 This weekend, I went for a walk with my wife and 6 month old son at the Elm Bank Conservation Area in Natick, MA, part of the Massachusetts Horticultural Society. There is a very nice wooded area along the Charles River that is gorgeous, but I can never manage to find a decent composition to capture it. This time, I had my Sigma 10-20mm F4-5.6 EX DC HSM hooked up and brought my new monopod out for a test drive. Again, I was unsuccessful at capturing any decent images from the wooded area, but afterward we went over to the Horticultural Society and walked around the gardens. Being November in New England, there isn’t much of a garden left, but it made for a nice desolate feel.
It was around 3:30PM, so the sun was getting low in the sky, casting a beautiful light. However, because I wanted to shoot into the sun (and I didn’t have a ND Grad with me), I knew I would be unable to capture the entire dynamic range of the scene in a single shot, so I decided to shoot HDR. I believe that HDR is a technique – a means to an end, not an end in and of itself. By that, I mean that I try to use HDR to make something look mostly realistic rather than hideously cartoonish. However, to shoot HDR, you need to have 3 (or more) very well aligned images. Sure, software can often align the images for you, but it doesn’t seem to ever come out just right. A tripod is ideal for this, but a monopod works as well. Today, knowing I was on a family outing, I brought the much lighter and more portable monopod.
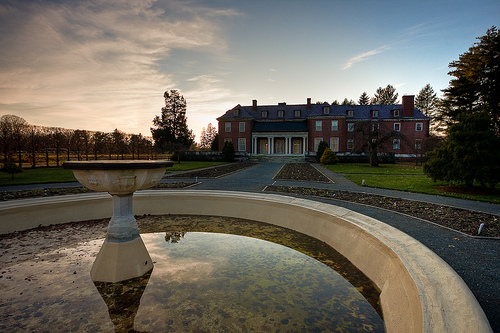
First, I decided on my composition. I wanted the fountain in the foreground with the fountain wall leading to the path, which leads to the house. I put the fountain in the lower left third of the image and the house somewhere in the middle-right upper third. Additionally, I wanted to make sure that the horizon wasn’t dead in the middle of the image. In retrospect, I wish I could have gotten a bit higher up, so that the fountain itself was not quite as aligned with the horizon as it is, but I am only 6′ tall and didn’t have a step-ladder with me! After I got my composition figured out (including a few test shots), I set my camera up for Auto Exposure Bracketing (AEB) and my aperture to f/7.1 @ ISO 200. With this wide a lens, depth of field is rarely a problem, so I mostly decided on that aperture so that I would be working in the lens’ sweet spot for sharpness. I fired a few test shots and realized that the normal exposure was still very blown out, so I adjusted my Exposure Compensation (EV) to -1 stop. With AEB set to 2 stops, I ended up with these three shots:
-
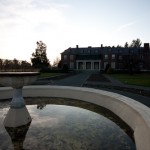
- “Normal” (f/7.1 – ISO 200 – 1/320″)
-
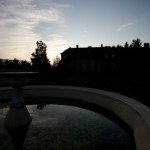
- -2 Stops (f/7.1 – ISO 200 – 1/1250″)
-

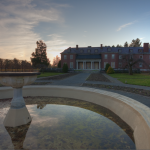
- +2 Stops (f/7.1 – ISO 200 – 1/80″)
-
- After Tone Mapping
Fast forward – I’m home and my images are downloaded. I now have those 3 shots in Lightroom. I then exported them to Photomatix as TIF files (to retain as much bit depth as possible) and after tone mapping to look as realistic as possible, I ended up with the “After Tone Mapping” shot above. There is no magic formula with tone mapping – I just drag the sliders around until I get the effect that I’m looking for. When in doubt, less is better than more, and if you get halos around strongly contrasting edges, back the strength off a bit. As is often the case, freshly tone mapped HDRs lack contrast and impact so back in Lightroom, I added that contrast back in by changing the Point Curve (under “Tone Curve”) to “Medium Contrast” and by bumping up the Blacks, Clarity, and Vibrance. A little highly masked sharpening, and I was ready for uploading to Flickr! If you want the specifics, the exact Photomatix settings are in the EXIF Data on Flickr.