Photographing Animals at the Zoo (Lions, & Lemurs, oh my!) [Part 1]
Saturday, I went to the Franklin Park Zoo in Dorchester, MA (just outside of Boston) with my friends Erik and Matt for a blustery January photowalk. We all showed up with our long lenses and winter apparel and started our journey outside. I was taking my new Canon 70-200 f/2.8L out for it’s first spin, attached to my Canon Rebel XTi/400D. I really took it (and my ability) through the ringer, shooting in bright direct sun at ISO 100 handheld all the way to dimly lit interior shots requiring high ISO, slow shutter speeds, and a monopod.
First up, a lion in the snow!
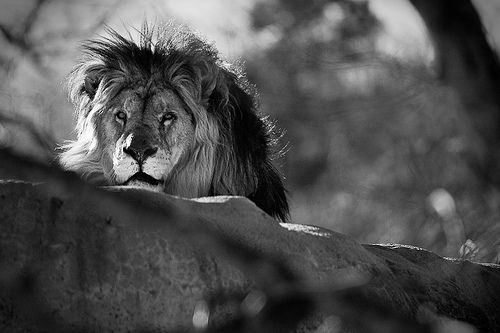 Being winter in New England, there were very few animals outside, but we were quickly greeted by an earth shaking lion’s roar. As we approached, the guy you see here was standing on top of his rock, as if to tell us that we would be food if he could only get out of his pen. If you’ve never heard a lion’s roar live in concert, it is quite a thing to experience. Plus, the juxtaposition of a lion with a foot of packed snow on the ground was equally unusual.
Mr. Lion was kept in by two different types of barricades. On two sides, he had an extremely deep and wide sheer rock chasm. This provided us photographers with a nearly unobstructed view of the King of the Jungle. On the other sides, he was glassed in with very thick, contrast reducing, flare inducing glass.
The shot above was taken through thick, scratched glass as he was staring me down. It was difficult to capture him through the branches, but I stood on my tip-toes and leaned against the glass and was able to get a clear shot of his face. As usual, I was shooting aperture priority (Av) mode, which allowed me to chose my f/stop and ISO while the camera chose the shutter speed. In this case, I picked f/2.8 to get that nice shallow depth of field. Because I would be shooting moving animals with a long lens, I had to keep the shutter speed high. The rule of thumb is to keep the shutter speed no slower than 1/(effective focal length) to avoid shake blur from hand holding the camera. I chose ISO 200, which in this shot gave me a shutter speed of 1/1000″ – plenty fast enough to get a sharp image, hand-held, at 200mm.
In order to avoid flare and reflections from the glass I was shooting through, I made sure to have the lens hood pressed up against the glass as close as possible. Even then, I could see a reflection coming in, so I used my left hand to block the source of the reflection. I took a number of similar shots to this, but tried to wait for the moment when he was staring me down. I focused on his eyes and recomposed the image so that he was not smack in the middle of the photograph. The rule of thirds always helps make for a better image.
 Here is what came out of the camera. As you can see, the image is pretty sharp, but seriously lacking in contrast and color vibrance. The Lion is also somewhat back and side lit, causing his face to be a bit too dark and the background a bit too bright. The first thing I did in Lightroom was to bring up the black levels substantially (+30). This took care of the biggest problem, which was a lack of dark tones in the image. I tried a number of things to bring out the colors in the image, but they were just lost behind the glass. So, I converted the image to black and white. My philosophy is that if the colors in an image do not do anything to improve the image, get rid of them. Black and White also gives you the ability to greatly increase the contrast of an image, which I did in this case by setting the tone curve to “strong contrast” and bringing contrast up to +77.
I also did some messing around with the color luminosities to darken the rocks and bring out some detail in the lion’s face. This changed the image from a flat grayscale image to one with some more depth and contrast. That left me with the dark face to deal with. I used the adjustment brush set to +1 stop exposure and drew all over his face. Because the feathering level on the brush was set quite high, it doesn’t end up looking unnaturally brightened. I cropped the image a bit from the left, added a slight vignette, and then uploaded it to flickr.
This is more post processing work than I usually put into my images, but I think it paid off here. I don’t consider this my best work by far, but I think it shows what you can do with a decently composed, yet somewhat technically flawed image.
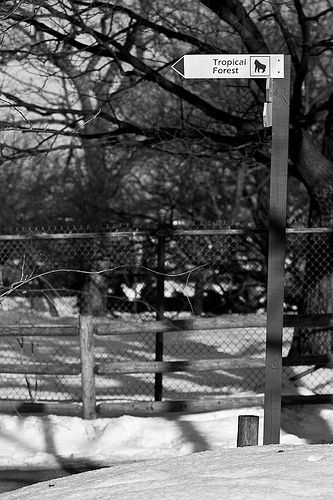
To finish up, I present you with this odd juxtaposition:
Let me know what you think or if you have any questions.
Next up, LEMURS, indoors!