Photographing Animals at the Zoo [Part 2] – Lemurs!!
 Erik, Matt, and I went to the Franklin Park Zoo last weekend. Previously, I wrote a post about taking shots of the resident lion at the zoo. After meandering around the zoo for a while, we went to the Tropical Forest. Dressed in our winter garb, complete with hats, gloves, and scarves to combat the 20 degree weather and 25 mph winds, we entered the warm, humid Tropical Forest.
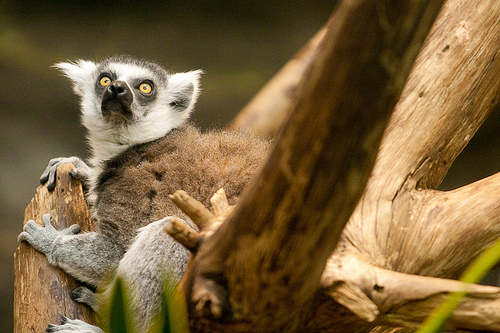
 Where I was able to shoot at 1/1000″ at f/2.8 and ISO 200 outside, inside was another matter. I walked around for awhile, checking out the Gorillas, various birds, some hog-like creature, and various other animals when I found the lemurs. A whole bunch of them. Though their environment was naturally lit via skylights, it was still pretty dang dark, and behind a thick pane of reflective glass. I immediately knew I would have to start shooting at ISO 1600. Knowing we were going inside, I had borrowed Erik’s monopod, so thankfully I would be able to keep my non-IS Canon 70-200 f/2.8L lens steady. Recall from the previous post that at a minimum, one needs to shoot at 1/efl (effective focal length) if hand-holding a camera. Using a monopod greatly reduces that requirement, though and I was able to shoot down to 1/30″ and still get sharp pictures, even at 200mm. I was still shooting Aperture Priority Mode with Exposure Compensation to +1/3 stop on my Canon Rebel XTi/400D at f/2.8 to let enough light in and to get a nice shallow depth of field. When I started shooting these rapidly moving little buggers, I was getting between 1/30″ and 1/60″ for a shutter speed! That’s a full 7-8 stops darker than what I was finding outside. Thank goodness for that monopod and fast lens!
[tangent]
When I used to shoot with my Canon S2 IS point and shoot camera, I wouldn’t even bother taking a shot if I had to go over ISO 200 and ISO 400 was a grainy mess. The world of DSLRs changes that. Now, I don’t hesitate to shoot at ISO 1600. Heck, ISO 400 is kind of my starting point and I adjust from there. Sure, 800 and 1600 are noisier than lower ISO settings, but if you get a good exposure, exposing to the right, the noise is not objectionable at all, especially once you take a 10mp image and reduce it to an 800×600 image on the screen. Even printed 8×10″, the noise just doesn’t really show up….if you got the exposure right. I can’t emphasize this enough – an under exposed low ISO image will have more objectionable noise than a well exposed high ISO image. So, if the light gets low and bumping up the ISO will allow you to get a better exposure, don’t be afraid. I tell you, a blurry, dark ISO 400 shot is going to look a heck of a lot worse than a sharp ISO 1600 shot. Plus, if you’re using flash, you’ll be able to capture some of the environment and not just end up with a blown out head sticking out of a black hole.
[/tangent]
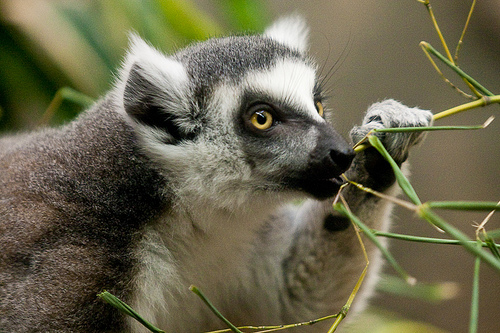
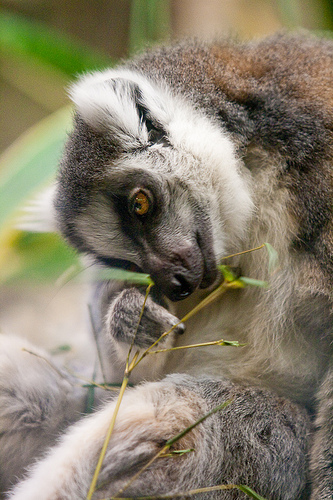
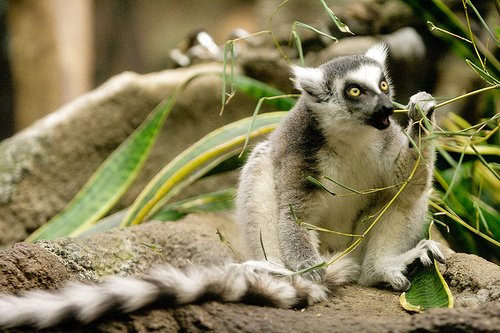
Now the problem wasn’t camera shake, it was getting the lemurs to stand still long enough to shoot them at such a slow shutter speed. 1/30″ – 1/60″ is just too slow to capture rapidly moving primates swinging from trees and chasing their friends. I quickly gave up on trying to catch these guys running around playing, so I started focusing on the little guys eating lunch. Did I mention that they were also behind glass? So, I got down low to the floor, got my lens as close to the glass as I could (to eliminate glare) as much as possible, and went to work. Because of the large aperture, long focal lengths, close shooting distances, and subsequently shallow depth of field, I ended up with a lot of well framed shots where a nose, or a claw, or an ear was in crisp focus, but the eyes were not. It doesn’t matter if it’s an animal or a human, a portrait just doesn’t work if the eyes are not in focus. If you can’t get both eyes in focus, the near eye really needs to be in sharp focus. Also, because of the slow shutter speeds and the spastic creatures, I ended up with a lot of pictures where the fur on the body and arms was in crisp focus, but the head was a blurry mess as they moved their heads around. Again, focusing on the slow moving, feeding lemurs was the way to go and I got several decent shots.
 Sweating from our winter garb in a tropical environment, we packed up at closing time when the zoo staff kicked us out. When I got home and downloaded the images into Lightroom (after some warm Tazo Chai…mmmmm), I flagged the ones I liked, deleted the total losers (out of focus, blurry, etc), and keyworded them. The lion picture from the last post took a lot of post processing work to get it to pop, but these lemur pictures came out of the camera almost like you see them. For a few of them, I had to bump up the exposure 1/3 of a stop or so. Because I was shooting through glass…again…there was a little loss of contrast, so I bumped up the black level a little bit, as well as the contrast and vibrance. Then, I exported them straight to flickr and Facebook with sharpening set to high, using Jeffrey Friedl’s Facebook and Flickr plugins for Lightroom.
Did you learn something? Have some questions? Am I full of it? Do you hate my photos and wish I’d shut up about them? Let me know by posting in the comments!
Back to Part 1